
How to Fix Common Laminating Problems
Index
Even a well-maintained laminator can produce bubbles, wrinkles, cloudy patches, or jams if the temperature, speed, film, or feeding is not quite right. Most of these problems have a clear cause, and once you can recognise the symptom, the fix is usually straightforward.
This guide explains the most common laminating problems for business use, the likely cause of each, and how to correct and prevent them. It also looks at why manual and entry-level machines tend to produce inconsistent results, and how automated feeding and temperature control reduce failures in high-volume work.
Note: Recommended temperature, speed, film thickness, and warm-up time vary by laminator model and film type. Always follow the machine manual and the film supplier's guidance, and confirm the latest specifications with the manufacturer or an authorised supplier.
Key Takeaways
- Most laminating faults come from four adjustable factors: temperature, speed, film compatibility, and how the material is fed.
- Bubbles and a cloudy finish usually point to a heat problem — too high, too low, inconsistent, or not enough warm-up time.
- Wrinkles and jams are most often feeding and alignment issues, made worse by dirty or worn rollers.
- On manual machines, results depend heavily on the operator; automatic feeding and temperature control make output more consistent for repeated work.
Before You Troubleshoot: Check the Basics First
Before adjusting anything, confirm three things. First, that the machine has fully reached its operating temperature — on some laminators, the ready indicator may appear before the rollers have reached the optimal temperature for a clean seal. Second, that the film thickness and type match what the machine supports. Third, that the material is clean, dry, and lying flat before it enters the machine.
A large share of laminating faults disappear once these basics are correct. If problems continue after checking them, use the sections below to match the symptom to its likely cause.

Illustrative examples of laminating defects.
Similar symptoms can have different causes.
Similar symptoms can have different causes.
Bubbles and Air Pockets
Bubbles are one of the most common laminating faults and are commonly related to heat, pressure, film compatibility, or feeding conditions. If the temperature is too high, the adhesive can overheat and trap air, creating pockets across the surface. If the temperature is too low, the adhesive may not activate fully, leaving weak, uneven areas that look like bubbles.
To correct it, first allow the machine to finish warming up, then adjust the temperature towards the film supplier's recommended range. Make sure the material is smooth and free of dust before feeding, and, if the machine has an adjustable pressure setting, check that it suits the film thickness you are using.
| Likely cause | What to do |
|---|---|
| Temperature too high | Lower the temperature towards the film's recommended range and re-test on a scrap sheet. |
| Temperature too low / not warmed up | Wait for full warm-up; increase temperature slightly if adhesion is weak. |
| Dust or moisture on the material | Clean and dry the material; laminate in a dust-free area. |
| Film not compatible with the machine | Confirm supported film type and thickness before continuing. |
Wrinkles and Creases
Wrinkling usually happens when the material is not fed straight into the machine. Even a slight angle can create folds as the film is applied. Worn, dirty, or misaligned rollers can also drag the film unevenly and produce creases.
Feed each item squarely and let the machine pull it through without pushing or pulling. If wrinkles persist even with straight feeding, inspect the rollers for residue or damage, as described in the maintenance guide. On high-volume machines, uneven roller tension is a frequent cause that cleaning alone will not fix.
Cloudy, Hazy, or Silvery Finish
A cloudy or silvery finish means the adhesive has softened but has not bonded evenly to the material. The most common cause is insufficient or inconsistent heat, often because the machine has not fully warmed up or the run speed is too fast for the film.
If the finish is hazy, slow the machine down so more heat reaches the film, or raise the temperature slightly within the recommended range. Give the laminator its full warm-up time before starting a batch. A clear finish depends on the right balance between temperature and speed — too fast leaves it cloudy, too slow can make it wavy.
Jams and Misfeeds
Jamming disrupts production and can damage both the material and the machine. Most jams are caused by material fed at an angle, film that is the wrong size for the machine, or debris caught on the rollers.
Load each item straight and centred, and make sure it is free of folds before feeding. When using pouches, use the size recommended for the machine and feed the sealed edge first so the film enters smoothly. If a jam occurs, follow the manufacturer's instructions for clearing it rather than pulling the material out by force, which can leave adhesive on the rollers.
| Symptom | Most likely cause |
|---|---|
| Repeated jams | Material fed at an angle, wrong pouch/film size, or adhesive build-up on rollers |
| Film wraps around the roller | Feeding the open edge first, or temperature set too high |
| Uneven pull-through | Worn or unevenly tensioned rollers |
Curling After Lamination
Curling happens when heat and tension are not balanced on both sides of the material, or when the film is much thicker or thinner than the machine is set for. Thin films exposed to excessive heat are especially prone to curling.
Check that the temperature suits the film thickness and allow finished items to cool flat before stacking. If a specific film consistently curls, review whether its thickness is appropriate for the application and the machine's supported range.
Why Manual and Entry-Level Machines Produce Inconsistent Results
Many of the faults above share a single underlying cause: the result depends on the operator getting the temperature, speed, and feeding exactly right, every time. On manual and entry-level machines, small variations between operators — feeding angle, timing, how flat the material is placed — lead to bubbles, wrinkles, and rejected output.
For occasional office use this is manageable. For teams laminating large volumes of notices, POS materials, menus, or covers, repeated failures waste film, paper, ink, and staff time. The more items you laminate, the more consistency matters.
How Automation Reduces Laminating Failures
Automatic laminators are designed to remove the operator variation that causes many of these problems. Automatic feeding keeps material square and evenly aligned, controlled heating maintains a stable temperature so the finish stays clear, and consistent roller tension reduces wrinkles and jams across long runs.
For high-volume environments, this means fewer bubbles, fewer creases, and less rejected output — which lowers rework and keeps output quality steady even when different staff operate the machine. If your team spends significant time correcting failed laminations, a fully automatic laminator can reduce the time lost to rework and keep production moving.
FAQs About Laminator Troubleshooting
Q. Why does my laminator keep making bubbles?
A. Bubbles are usually a heat problem. If the temperature is too high the adhesive overheats and traps air; if it is too low or the machine has not warmed up, the adhesive does not bond evenly. Adjust the temperature to the film's recommended range and make sure the material is clean and flat.
Q. How do I stop wrinkles when laminating?
A. Feed each item straight and centred, and let the machine pull it through on its own. If wrinkles continue, check the rollers for residue, wear, or uneven tension, which can drag the film unevenly.
Q. Why does my laminated document look cloudy?
A. A cloudy or silvery finish means the film has not bonded evenly, usually from insufficient or inconsistent heat. Allow full warm-up, slow the machine down, or raise the temperature slightly within the recommended range.
Q. What causes a laminator to jam?
A. Most jams come from material fed at an angle, film that is the wrong size for the machine, or adhesive build-up on the rollers. Feed straight, use the recommended film size, and feed the sealed edge of a pouch first.
Q. Will an automatic laminator fix these problems?
A. Automatic feeding and controlled temperature remove much of the operator variation that causes bubbles, wrinkles, and jams, which makes output more consistent in high-volume use. The film still needs to match the machine and application.
Conclusion
Most laminating problems trace back to four adjustable factors — temperature, speed, film compatibility, and feeding. Bubbles and cloudy finishes point to heat, while wrinkles and jams point to feeding and rollers. Checking the basics first, then matching the symptom to its cause, resolves the majority of day-to-day faults.
Regular cleaning and maintenance help keep these faults rare, so it is worth reviewing the laminator maintenance guide alongside this page and confirming your film choice suits both the machine and the job. For teams where inconsistent results and rework are a recurring cost, a fully automatic laminator such as the LAMI Revo series removes much of the operator variation that causes these problems in the first place.
[Advertisement]
[By production scale]
Three Fully Automatic Laminators
[By production scale]
Three Fully Automatic Laminators
When choosing a fully automatic laminator, it is important to base your decision on the volume you process in a day rather than the size of the main unit or equipment scale.
This is an introduction to fully automatic laminators that match the workload and operational style of different production scales.
Advertiser Disclosure:
We receive compensation from some of the companies listed below.This compensation may affect which companies are included and the order in which they appear.
[About 100+ sheets per month]
Small-lot production
Small-lot production
GBC Foton 30
(ACCO Brands Corporation)
(ACCO Brands Corporation)
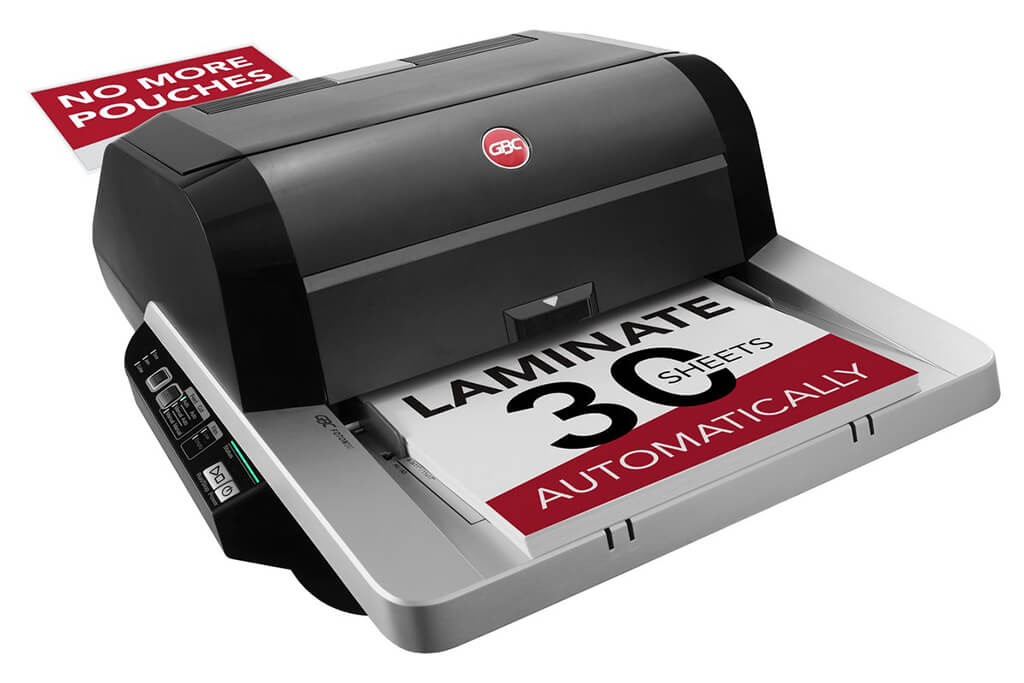
Image Source: ACCO Brands Corporation Official Site
(https://www.gbc-machines.com/products/gbc-foton-30-automatic-laminator)
(https://www.gbc-machines.com/products/gbc-foton-30-automatic-laminator)
Example facilities
Schools, hospitals, municipalities, etc.
Reasons for recommendation
Automates small-scale operations with fewer personnel
- With the push of a button, automatically laminates 30 sheets of A4 paper in 15 minutes. Its size allows it to be placed on a desk, making it easy to install.
- By fully automating the process from feeding to lamination, it enables the handling of jobs with low daily processing volumes in parallel with other operations.
The fact that it does not require dedicated operators or subsequent processes makes it suitable for small-scale sites.
| Maximum processing speed | 7.0 m/min |
|---|---|
| Maximum width | 297 mm (A3 compatible) |
| Warm-up | about 4 minutes |
| Processing type | roll type, double-sided (with borders) |
| Voltage (CE) | AC220 to 240V |
| Main unit dimensions | W 580 mm / D 440 mm / H 250 mm |
[About 1,000+ sheets per month]
Medium-lot production
Medium-lot production
Revo-Flex
(Lami Corporation)
(Lami Corporation)
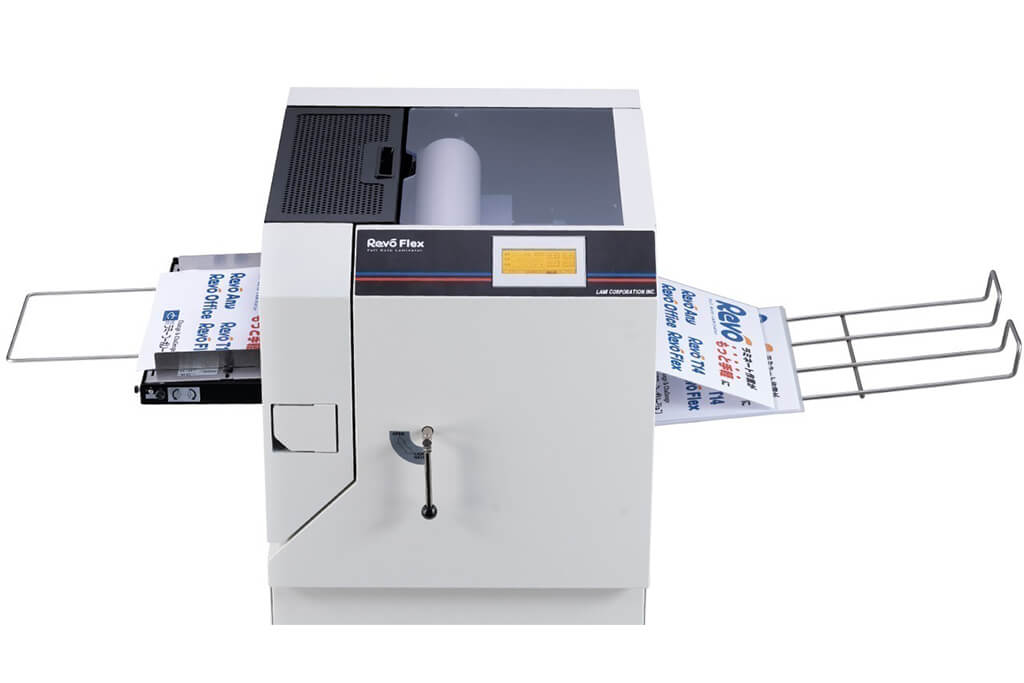
Image source: LAMI Corporation Official Website
(https://www.lami-corporation.co.jp/english/products/detail/51)
(https://www.lami-corporation.co.jp/english/products/detail/51)
Example facilities
Output centers, design offices, franchise headquarters, etc.
Reasons for recommendation
High-mix, fast-turnaround jobs are efficient through process reduction
- Completes trimming simultaneously with lamination, eliminating the need to move to subsequent processes or separate equipment.
Eliminates bottlenecks that tend to occur in on-demand printing and production sites. - High-precision automatic four-side trimming reduces trimming errors resulting from manual work, reducing film loss and the hassle of reprinting.
Even at sites with high-mix, small-lot production, it processes efficiently with consistent quality.
| Maximum processing speed | 2.0 m/min |
|---|---|
| Maximum width | 320 mm (SRA3 standard) |
| Warm-up | about 5 minutes *1 |
| Processing type | roll type, double-sided (border on/off selectable) |
| Voltage (CE) | AC230V |
| Main unit dimensions | W 1,300 mm / D 610 mm / H 1,080 mm *2 |
[10,000+ sheets per month]
High-lot production
High-lot production
Mini 76 TH
(Autobond Laminating)
(Autobond Laminating)
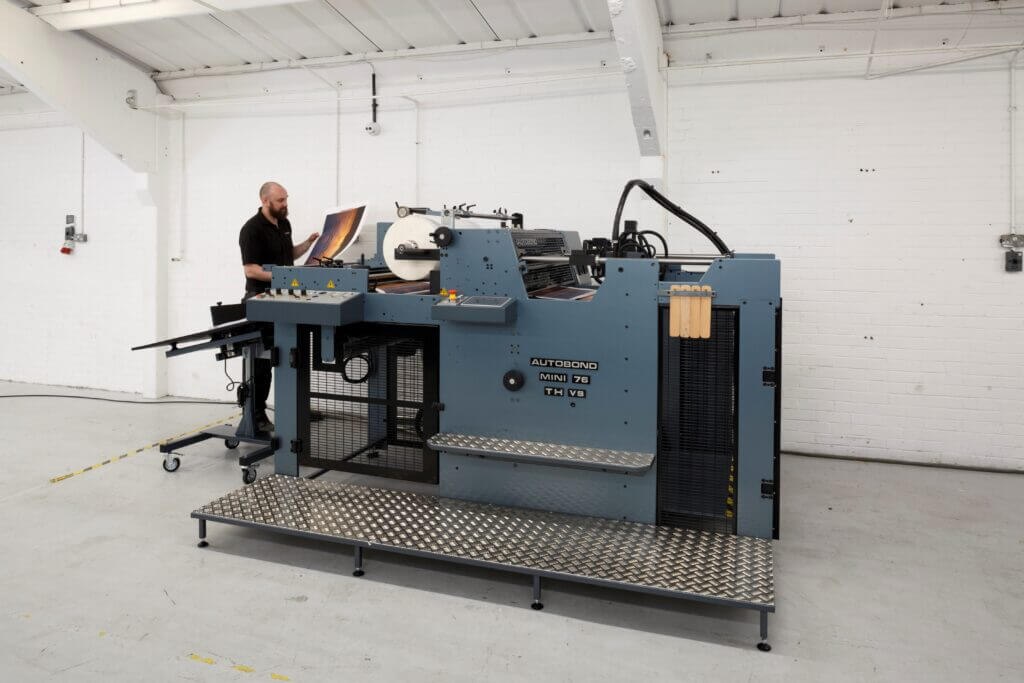
Image source: AUTOBOND Official Website
(https://www.autobondlaminating.com/machinery/thermal-lamination/mini/mini-76-th/)
(https://www.autobondlaminating.com/machinery/thermal-lamination/mini/mini-76-th/)
Example facilities
Printing factories, bookbinding lines, etc.
Reasons for recommendation
High-speed, continuous processing that can be integrated into mass-production lines
- Uses a steel side plate with a thickness of 20 mm described as sturdy like a tank. This rigid structure physically eliminates vibrations even at high-speed operations of 60 m per minute, maintaining stable processing accuracy.
- With a processing capacity of 60 m per minute, it can continuously handle large-format prints stably.
It demonstrates its true value when introduced as a part of a production line rather than as a standalone machine.
| Maximum processing speed | 60.0 m/min |
|---|---|
| Maximum width | 760 mm (B1+ compatible) |
| Warm-up | inquire for details |
| Processing type | roll type, single-sided or double-sided (borderless) |
| Voltage (CE) | inquire for details |
| Main unit dimensions | inquire for details |
*1. At 100°C (212°F) setting
*2. Dimensions when assembled, including the stand, tray, etc.