
Laminator Temperature Guide
Index
The correct laminator temperature depends on the film, adhesive, substrate and machine in use. There is no single temperature that works for every laminating job.
Some machines show a temperature in degrees, while others use pouch-thickness presets or select operating conditions automatically. A setting that works with one film may cause poor adhesion, curling or distortion with another.
Start with the laminator manual and the film supplier’s data sheet. Check that the film is compatible with the laminator, allow the machine to warm up fully, and test the settings on a sample made from the same materials as the production job.
What Does Laminator Temperature Affect?
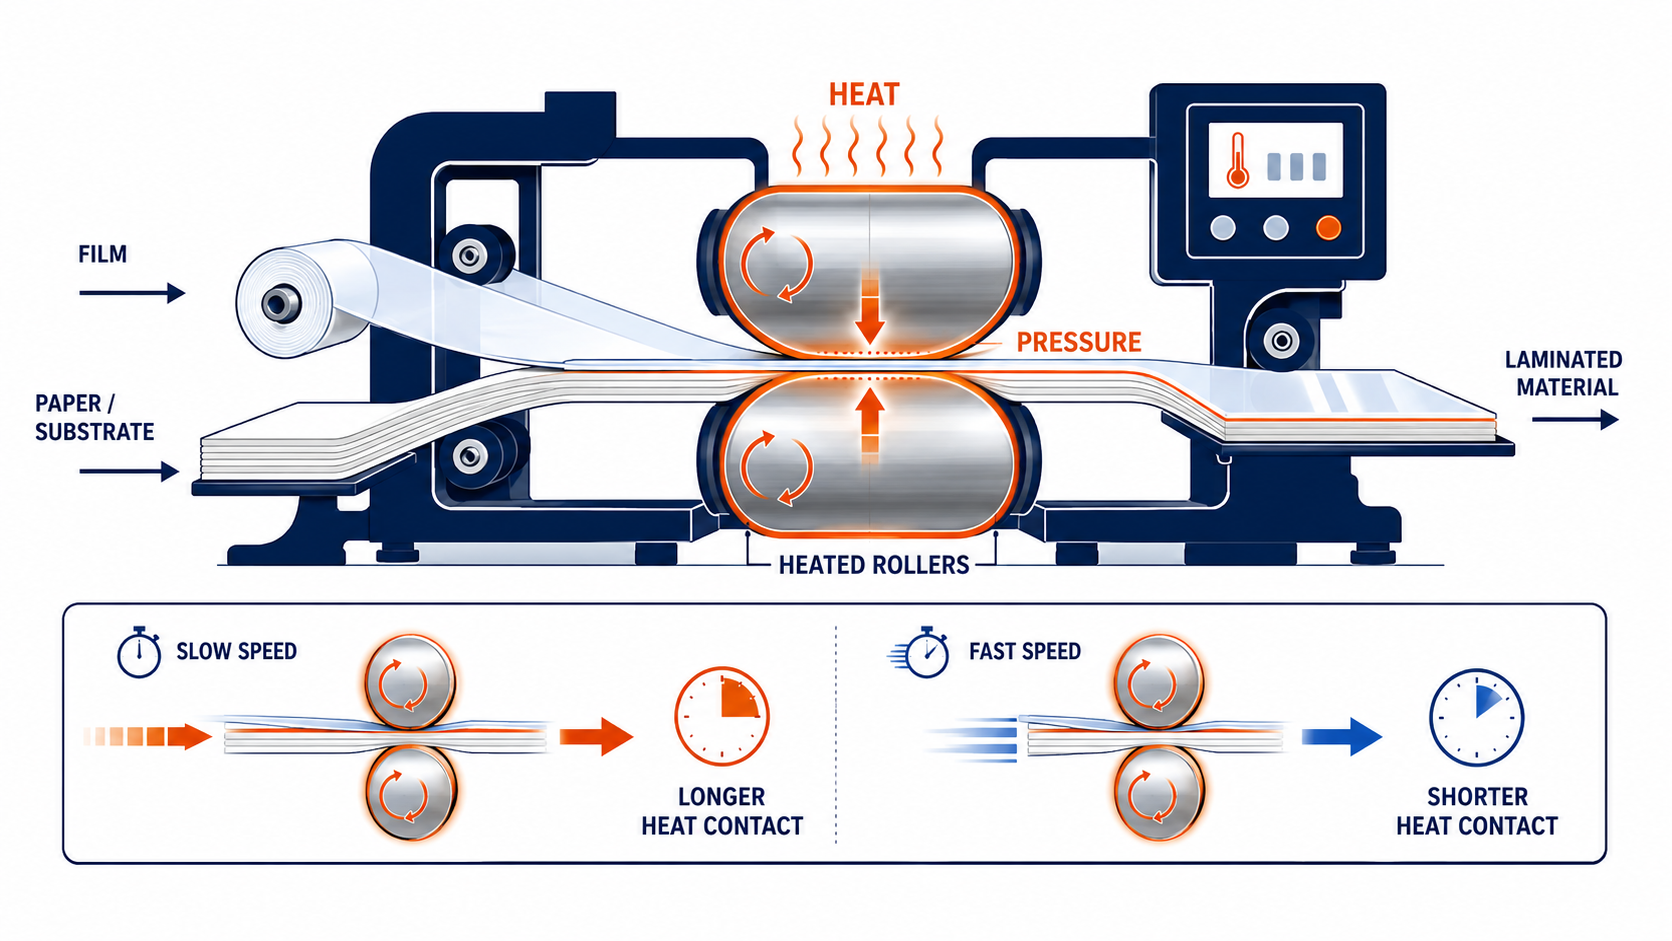
In hot lamination, heat softens or activates the adhesive layer while the rollers apply pressure. As the material passes through the machine, the film bonds to the paper, board or other compatible substrate.
The temperature shown on the control panel is only one part of the process. The amount of heat reaching the material also depends on the machine design and processing speed. At a slower speed, the film generally spends longer in contact with the heated section; at a faster speed, the contact time is shorter.
Cold lamination works differently. It uses pressure-sensitive rather than heat-activated adhesive, so self-adhesive or cold film should be processed using a compatible cold setting. See the guide to hot vs cold lamination for a detailed comparison of the two methods.
Laminators may use fixed operating conditions, presets based on pouch thickness, an adjustable temperature range or automatic controls. Follow the control method designed for the machine rather than trying to convert every setting into a single temperature value.
Source: Cosmo Films official website
(https://www.cosmofilms.com/public/uploads/pdf/13904027792.pdf)
(https://www.cosmofilms.com/public/uploads/pdf/13904027792.pdf)
Why There Is No Universal Laminating Temperature
Film construction and adhesive chemistry determine how much heat is needed to create a bond. Even films used with similar printed materials can have different recommended operating ranges.
Machine specifications also vary. A commercial roll laminator may allow separate temperature and speed adjustments, while an office pouch laminator may require the user to select only the pouch thickness. The machine then manages its internal operating conditions.
The figures below are examples from official manufacturer specifications. They illustrate why a value published for one product should not be treated as a general recommendation for another.
| Product or system | Published temperature information | What it shows |
|---|---|---|
| Cosmo BOPP thermal gloss and matte films | 100–120°C | The supplier advises adjusting operating conditions according to speed and dimensional stability. |
| Cosmo PET thermal gloss film | 118–135°C | A PET-based product can have a different operating range from a BOPP-based film. |
| LAMI Revo-Flex | OFF or 80–140°C | The machine provides an adjustable range and is designed for use with authorised Revo film. |
| Vivid Matrix MX-370MP | 0–140°C | Temperature is controlled alongside variable speed and pneumatic pressure. |
| Fellowes Calibre | Cold, 75, 100, or 125 micron settings | The user selects a pouch-thickness setting rather than entering a temperature in degrees. |
These values are not interchangeable. The appropriate setting depends on five related factors:
- Film and adhesive: Standard thermal, low-melt, heat-assist and other adhesive systems activate under different conditions.
- Laminator design: Heating method, roller construction, temperature stability and control accuracy all affect heat transfer.
- Processing speed: Speed affects the time available for heat to reach the adhesive and substrate.
- Substrate: Heavy paper, coated stock, synthetic media and delicate prints absorb or tolerate heat differently.
- Production conditions: Warm-up, continuous operation and changes between jobs can affect output consistency.
Source: D&K Group official website
(https://www.dkgroup.com/thermal-heat-activatedassist/)
(https://www.dkgroup.com/thermal-heat-activatedassist/)
Before changing consumables, confirm the supported film type, thickness, width and adhesive system. The guide to choosing laminating rolls and films covers the other compatibility points to check.
How to Find the Right Laminator Temperature
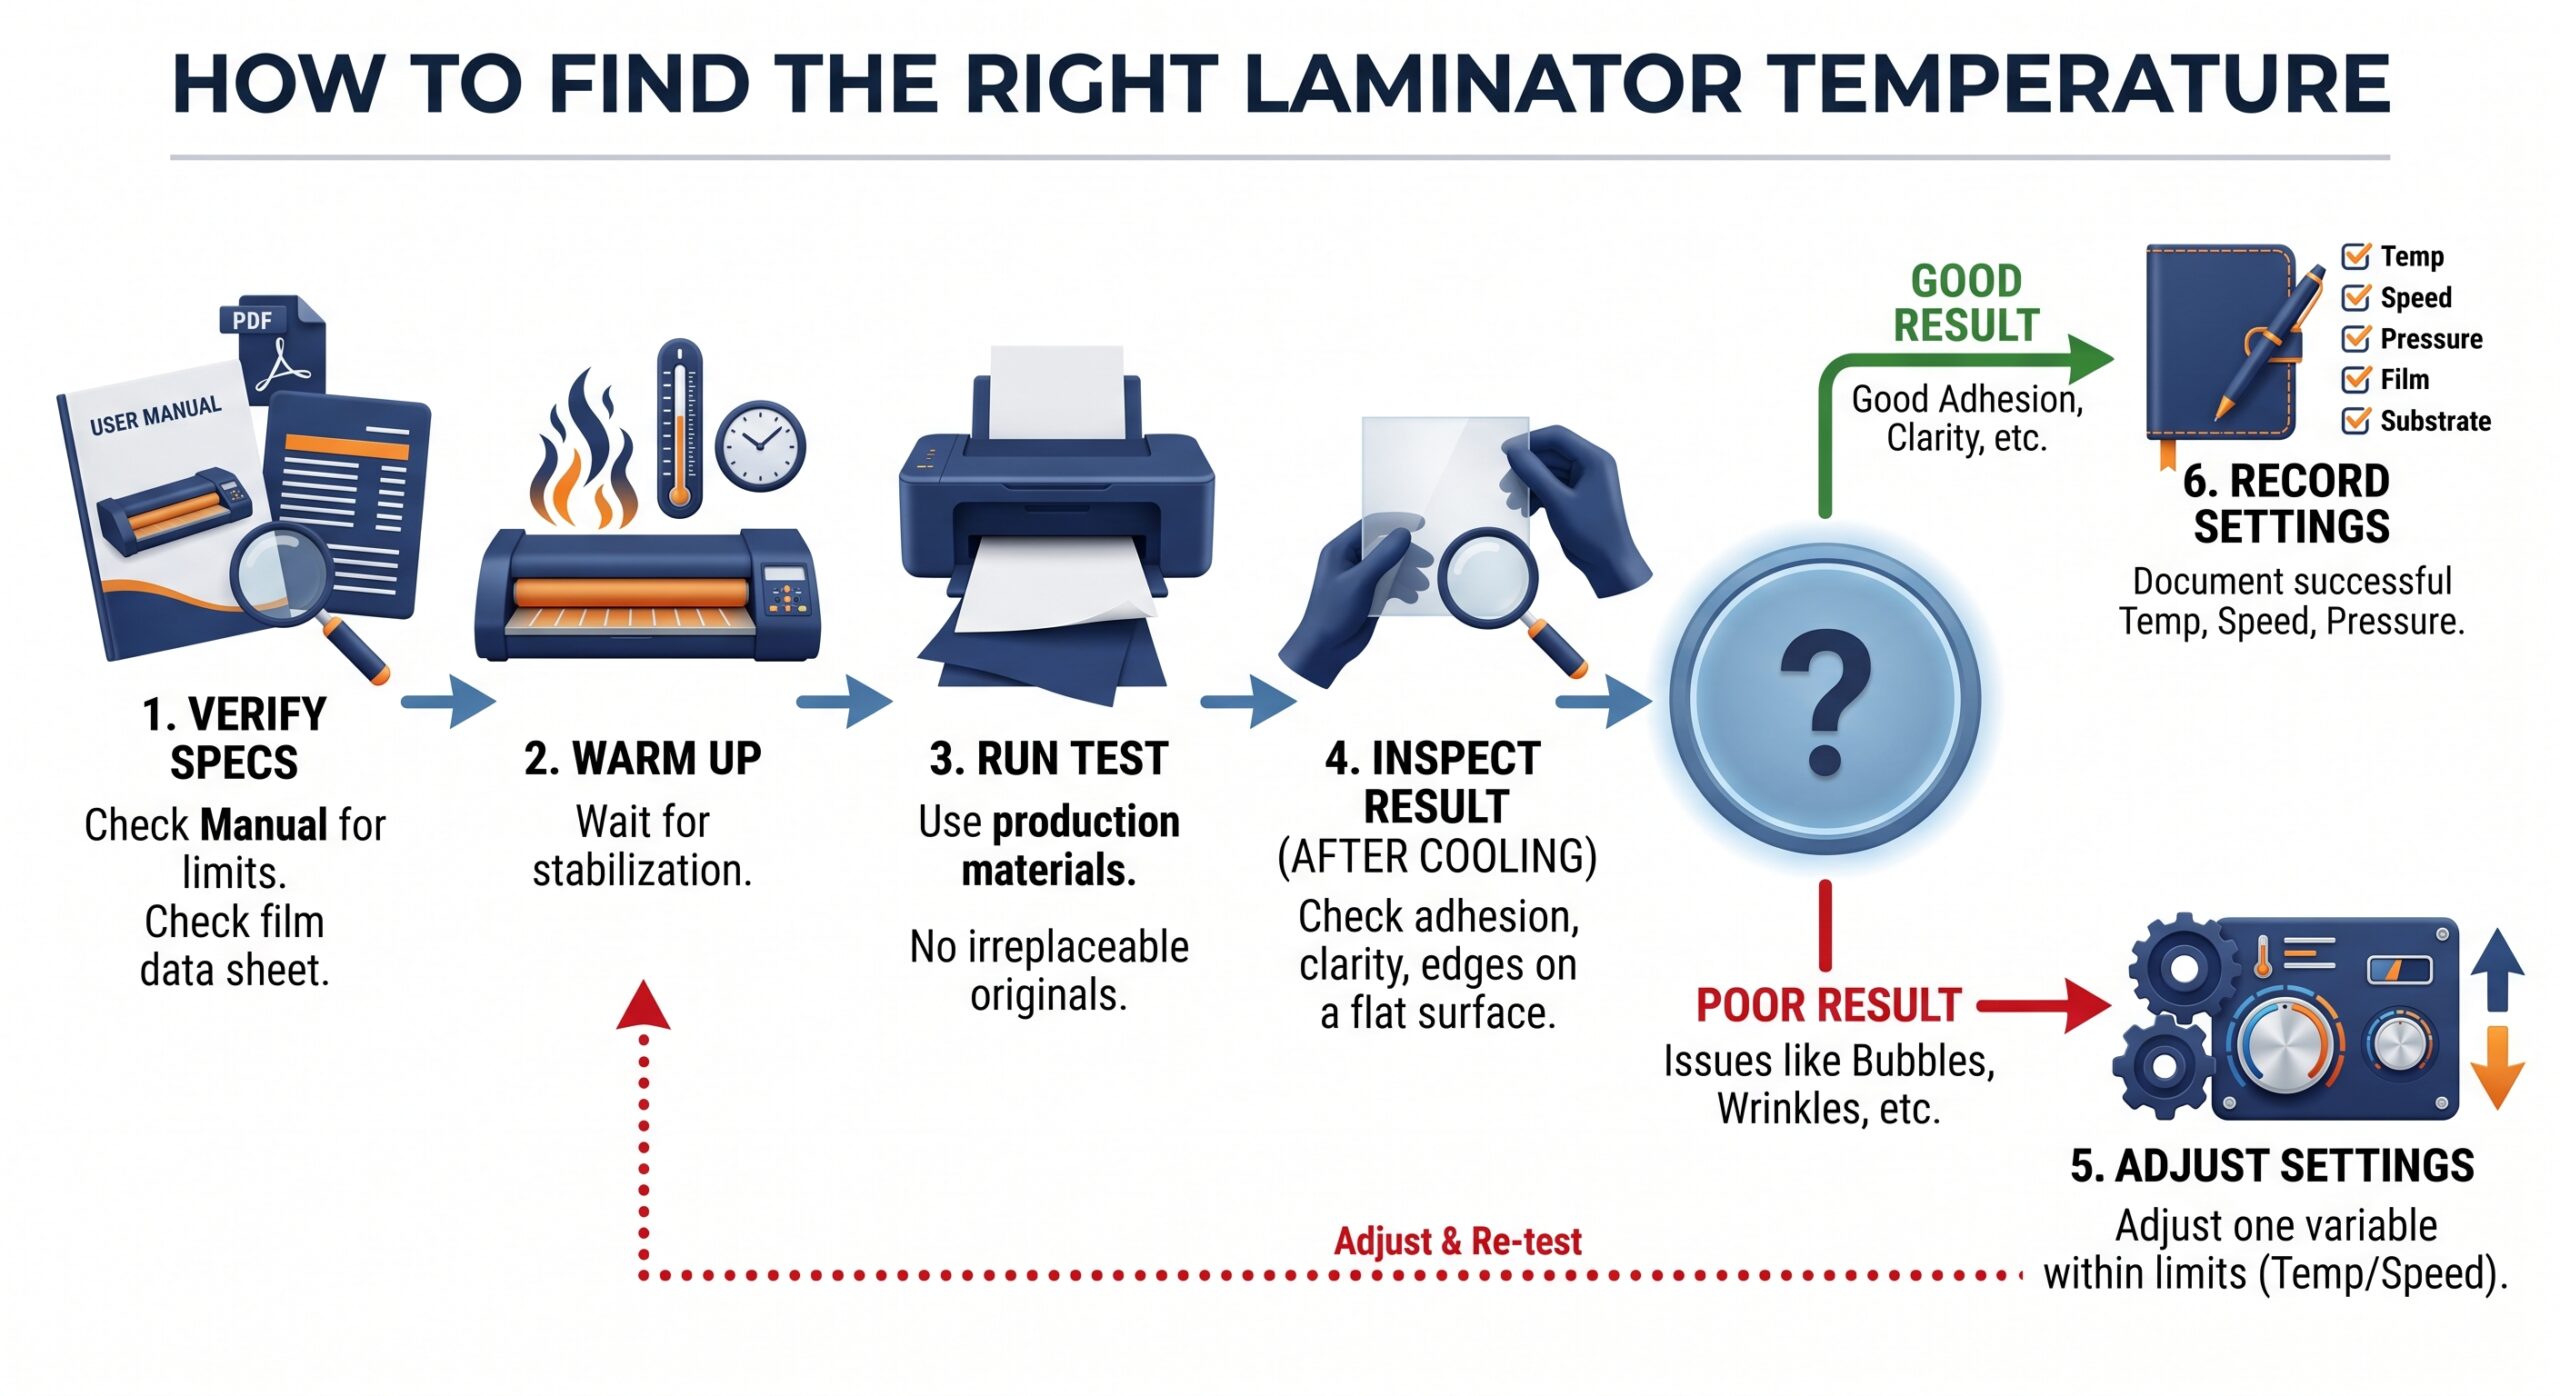
A controlled test is a better starting point than copying a temperature used with a different machine or film.
- Check the laminator manual. Confirm the supported temperature range, film types, thicknesses and control method. Do not exceed the machine’s stated operating limits.
- Read the film supplier’s data sheet. Use the recommended application range for the exact film and adhesive product rather than a generic range for a similar-looking film.
- Make sure the substrate can tolerate heat. Thermal paper, certain photographs, delicate prints and some synthetic materials can be damaged by hot lamination. Use a compatible cold process where required.
- Allow the laminator to warm up fully. The first sheets may bond inconsistently if production begins before the heating system has stabilised.
- Run a representative test. Use the same film, paper or board, print process, thickness and size planned for the production run. Do not use an irreplaceable original for testing.
- Inspect the result once it has cooled. Check adhesion, clarity, flatness, edges and surface condition after the material has cooled on a flat surface.
- Adjust one variable at a time. If the machine allows adjustment, change the temperature or speed in small steps within the supplier’s limits. Changing both at once makes it harder to identify what caused an improvement or defect.
For repeat jobs, record the film, substrate, temperature, speed and pressure settings that produced a successful result. A documented setup reduces trial runs and variation between operators during future production.
Source: Fellowes official product manual
(https://assets.fellowes.com/manuals/Calibre_409522_RevB_EUR_Calibre_Langs_v1.0_A4_25L_2017.pdf)
(https://assets.fellowes.com/manuals/Calibre_409522_RevB_EUR_Calibre_Langs_v1.0_A4_25L_2017.pdf)
Signs the Laminator Is Too Hot or Too Cold
Incorrect temperature can result in poor adhesion, haze, waves, bubbles or distortion. These symptoms can also have other causes, so check film compatibility, speed, pressure, feeding and roller condition before changing the temperature.
| Output symptom | Possible temperature-related cause | First checks |
|---|---|---|
| Milky or cloudy finish | The adhesive may not be receiving enough effective heat. | Check warm-up, the selected film setting and processing speed. |
| Film does not fully seal | The selected temperature or pouch-thickness setting may be incorrect. | Check the machine preset and supported material thickness. |
| Film lifts at the edges | The adhesive may not be fully activated. | Check the film data sheet and test within its recommended range. |
| Waves, ripples or distortion | The selected setting may be too high for the film or substrate. | Check the specified range and repeat the test at a lower approved setting. |
| Bubbles | Incorrect heat may contribute, but moisture, contamination, pressure or feeding can also be factors. | Inspect the material and machine before changing the setting. |
| Curling after lamination | Heat, tension, film balance or cooling may be uneven. | Check the setup and allow the finished item to cool flat. |
Source: Fellowes official product manual
(https://assets.fellowes.com/manuals/Calibre_409522_RevB_EUR_Calibre_Langs_v1.0_A4_25L_2017.pdf)
(https://assets.fellowes.com/manuals/Calibre_409522_RevB_EUR_Calibre_Langs_v1.0_A4_25L_2017.pdf)
If defects persist after the laminator has fully warmed up and the correct setting has been selected, temperature may not be the main cause. Dirty rollers, incorrect tension, angled feeding, moisture and incompatible film can produce similar symptoms. Use the laminator troubleshooting guide to investigate these issues separately.
What to Compare in Laminator Temperature Controls
The right type of control depends on the variety and volume of work being processed. A machine used with one dedicated film has different requirements from a production laminator that regularly switches between films, substrates and finishes.
Consider the following points when comparing models:
- Control type: Fixed temperature, pouch-thickness presets, adjustable temperature or automatic sensing
- Supported range: The temperatures and film conditions the machine is designed to handle
- Consumable compatibility: Approved film types, adhesive systems, thicknesses, widths and cartridges
- Speed control: Whether speed can be adjusted when a job requires more or less heating time
- Pressure control: Whether roller pressure is fixed, mechanically adjustable or pneumatic
- Warm-up and changeover: The time required to reach the initial setting or stabilise after a change
- Repeatability: Whether a stored or documented setup can be reproduced across repeated batches
- Operator involvement: How many settings and manual checks are required for each job
- Production capacity: Whether the machine can maintain the required conditions at the expected daily volume
A higher maximum temperature does not necessarily make one laminator better than another. Compare whether each machine can maintain the conditions required for the films, printed materials, sizes and production speeds used in your workflow.
Preset controls can simplify routine pouch lamination when the supported consumables remain consistent. Adjustable temperature, speed and pressure provide more control in production environments that use several films or printed stocks. Automatic or cartridge-based systems reduce setup decisions for repeat work but may limit the range of compatible consumables.
CHECK
Which Fully Automatic Laminator Fits Your Production Workflow?
When comparing machines, assess temperature control alongside film compatibility, processing speed, format range, production volume and the amount of operator setup required. A compact cartridge system, a preset laminator and an adjustable production machine suit different workflows.
Compare automatic laminators by workload, then check which models offer the controls and consumable options required for your regular jobs.
FAQs About Laminator Temperature
What temperature should a laminator be set at?
Use the temperature or film setting specified by the laminator manufacturer and the supplier of the exact film. Published operating ranges vary widely, so there is no single setting suitable for every laminator and film combination.
How hot does a laminator get?
It depends on the model. Some office machines do not display the operating temperature and instead use pouch-thickness presets, while adjustable commercial machines may have a maximum setting of around 140°C. Check the specification for the individual machine rather than assuming that all laminators reach the same temperature.
Do thicker laminating pouches always need more heat?
No. Pouch thickness can affect the selected machine setting, but adhesive formulation, film construction, speed and machine design also influence the required conditions. Use the pouch setting specified by the laminator rather than assuming that a thicker pouch always requires a higher temperature.
Why does laminated film look cloudy?
A cloudy or milky finish can indicate that the adhesive has not received enough heat to activate fully. The machine may not be fully warmed up, the selected film setting may be incorrect, or the processing speed may be too fast. Film compatibility, pressure and material condition should also be checked.
Can heat-sensitive documents be laminated?
Use a compatible cold-lamination process for materials that can be damaged by heat. Avoid hot-laminating thermal paper, sensitive originals or other materials that the machine or film supplier identifies as unsuitable for hot processing.
Should temperature or speed be adjusted first?
Start with the temperature and speed combination recommended for the film and laminator. If testing shows that an adjustment is needed, change one variable at a time and keep each adjustment within the published operating limits.
[Advertisement]
[By production scale]
Three Fully Automatic Laminators
[By production scale]
Three Fully Automatic Laminators
When choosing a fully automatic laminator, it is important to base your decision on the volume you process in a day rather than the size of the main unit or equipment scale.
This is an introduction to fully automatic laminators that match the workload and operational style of different production scales.
Advertiser Disclosure:
We receive compensation from some of the companies listed below.This compensation may affect which companies are included and the order in which they appear.
[About 100+ sheets per month]
Small-lot production
Small-lot production
GBC Foton 30
(ACCO Brands Corporation)
(ACCO Brands Corporation)
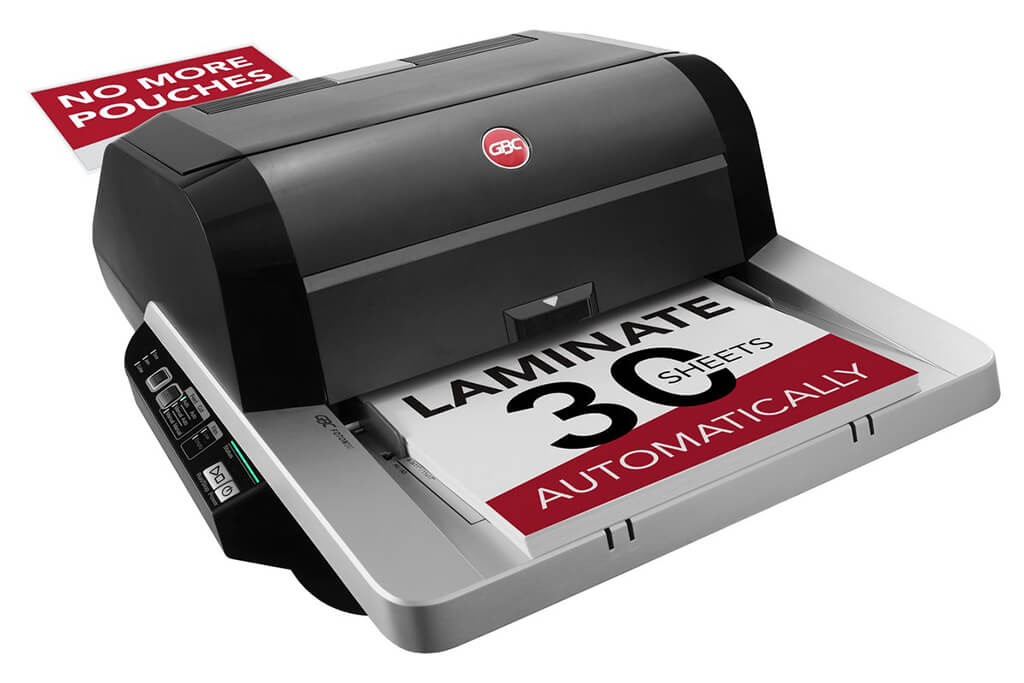
Image Source: ACCO Brands Corporation Official Site
(https://www.gbc-machines.com/products/gbc-foton-30-automatic-laminator)
(https://www.gbc-machines.com/products/gbc-foton-30-automatic-laminator)
Example facilities
Schools, hospitals, municipalities, etc.
Reasons for recommendation
Automates small-scale operations with fewer personnel
- With the push of a button, automatically laminates 30 sheets of A4 paper in 15 minutes. Its size allows it to be placed on a desk, making it easy to install.
- By fully automating the process from feeding to lamination, it enables the handling of jobs with low daily processing volumes in parallel with other operations.
The fact that it does not require dedicated operators or subsequent processes makes it suitable for small-scale sites.
| Maximum processing speed | 7.0 m/min |
|---|---|
| Maximum width | 297 mm (A3 compatible) |
| Warm-up | about 4 minutes |
| Processing type | roll type, double-sided (with borders) |
| Voltage (CE) | AC220 to 240V |
| Main unit dimensions | W 580 mm / D 440 mm / H 250 mm |
[About 1,000+ sheets per month]
Medium-lot production
Medium-lot production
Revo-Flex
(Lami Corporation)
(Lami Corporation)
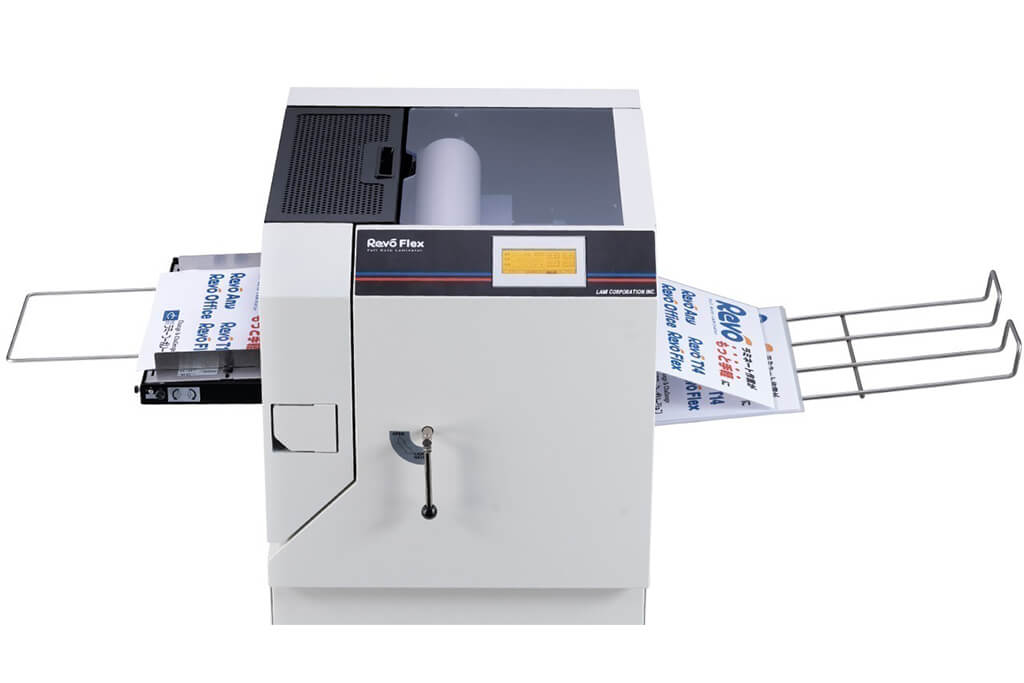
Image source: LAMI Corporation Official Website
(https://www.lami-corporation.co.jp/english/products/detail/51)
(https://www.lami-corporation.co.jp/english/products/detail/51)
Example facilities
Output centers, design offices, franchise headquarters, etc.
Reasons for recommendation
High-mix, fast-turnaround jobs are efficient through process reduction
- Completes trimming simultaneously with lamination, eliminating the need to move to subsequent processes or separate equipment.
Eliminates bottlenecks that tend to occur in on-demand printing and production sites. - High-precision automatic four-side trimming reduces trimming errors resulting from manual work, reducing film loss and the hassle of reprinting.
Even at sites with high-mix, small-lot production, it processes efficiently with consistent quality.
| Maximum processing speed | 2.0 m/min |
|---|---|
| Maximum width | 320 mm (SRA3 standard) |
| Warm-up | about 5 minutes *1 |
| Processing type | roll type, double-sided (border on/off selectable) |
| Voltage (CE) | AC230V |
| Main unit dimensions | W 1,300 mm / D 610 mm / H 1,080 mm *2 |
[10,000+ sheets per month]
High-lot production
High-lot production
Mini 76 TH
(Autobond Laminating)
(Autobond Laminating)
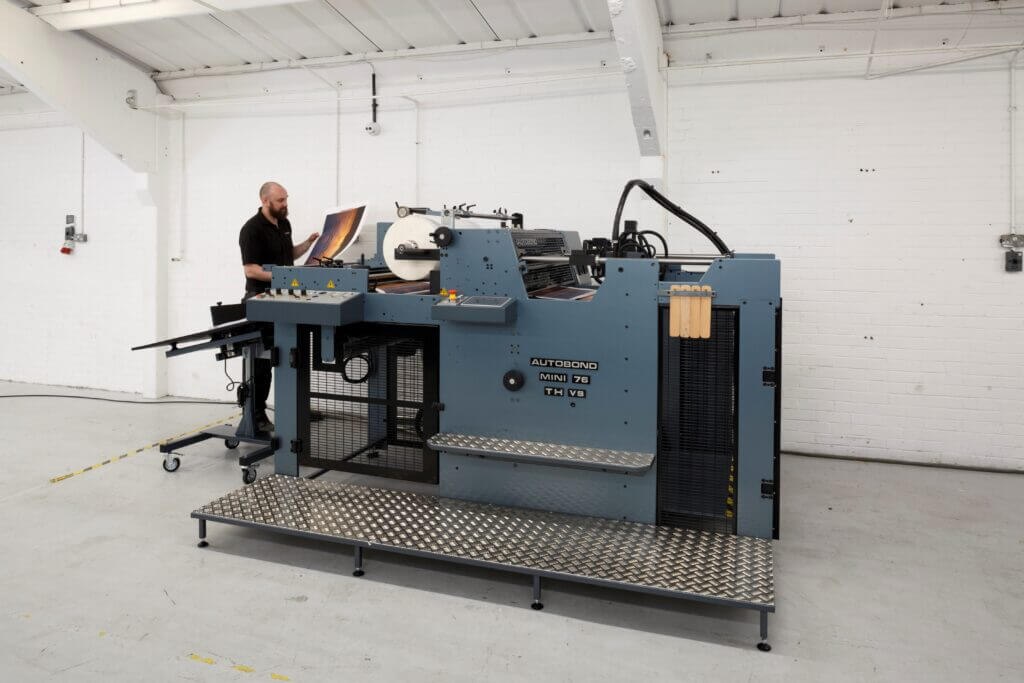
Image source: AUTOBOND Official Website
(https://www.autobondlaminating.com/machinery/thermal-lamination/mini/mini-76-th/)
(https://www.autobondlaminating.com/machinery/thermal-lamination/mini/mini-76-th/)
Example facilities
Printing factories, bookbinding lines, etc.
Reasons for recommendation
High-speed, continuous processing that can be integrated into mass-production lines
- Uses a steel side plate with a thickness of 20 mm described as sturdy like a tank. This rigid structure physically eliminates vibrations even at high-speed operations of 60 m per minute, maintaining stable processing accuracy.
- With a processing capacity of 60 m per minute, it can continuously handle large-format prints stably.
It demonstrates its true value when introduced as a part of a production line rather than as a standalone machine.
| Maximum processing speed | 60.0 m/min |
|---|---|
| Maximum width | 760 mm (B1+ compatible) |
| Warm-up | inquire for details |
| Processing type | roll type, single-sided or double-sided (borderless) |
| Voltage (CE) | inquire for details |
| Main unit dimensions | inquire for details |
*1. At 100°C (212°F) setting
*2. Dimensions when assembled, including the stand, tray, etc.